Step 5: Deploying the Application
It is now time to deploy the final version of the application on a server. This allows the application to be accessed at all times, from anywhere connected to the internet. User accounts are still used to restrict access to the data. Just because the server is publically accessible doesn’t mean the data are!
There are multiple options for deployment. Below is a guide for deploying on a new “Virtual Private Server” (VPS) on the DigitalOcean service. For more advanced users, there is also a guide for deploying on an existing server (though many of the steps will be similar to DigitalOcean setup).
Instructions are written for Ubuntu Server 18.04 or 16.04 LTS; other distributions may require slightly different procedures.
Important Note: DigitalOcean is NOT required to deploy PyTrackDat. Any server running an operating system which can host Docker containers is sufficient. DigitalOcean is a paid service; this may be restrictive to some. Free options include adapting an existing computer with a world-accessible IP address or using Amazon AWS’ free tier (which only lasts 12 months.)
Deploying the End Result on DigitalOcean
DigitalOcean is a cost-effective VPS (virtual private server) hosting provider. For $5 USD per month, users can create a server on which the created web application and database can be hosted. For an additional $1 USD per month, automatic backups can be enabled.
If you already have a server on which the application can be deployed, see the section below. The DigitalOcean service provider is not specifically required to run the application.
Deployment Step 1: Create a DigitalOcean account
Create a DigitalOcean account on their signup page. Confirm the email used to create the account.
Make sure to enter in payment details that will allow a recurring charge of $5 USD per month (as of the time of writing, the cheapest Droplet/VPS that one can create) for hosting the application.
Deployment Step 2: Create a new droplet (virtual machine)
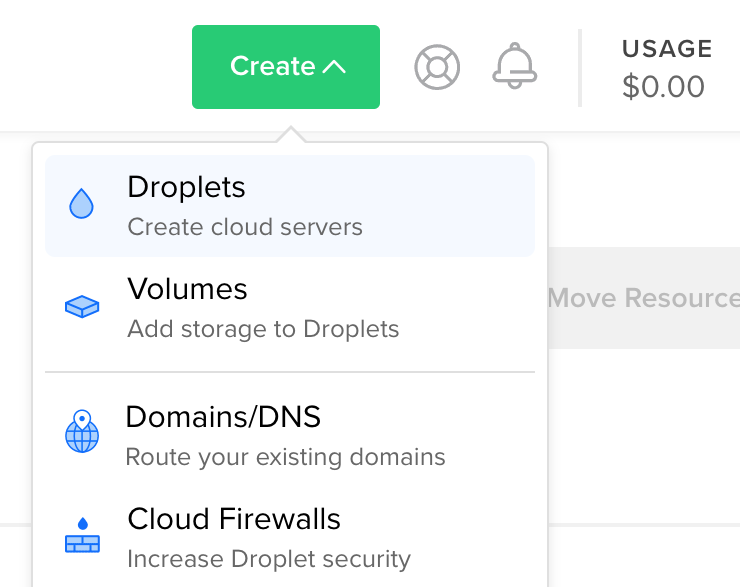
Once logged into the DigitalOcean dashboard, create a new virtual machine by clicking the “Create” button and selecting “Droplets”.
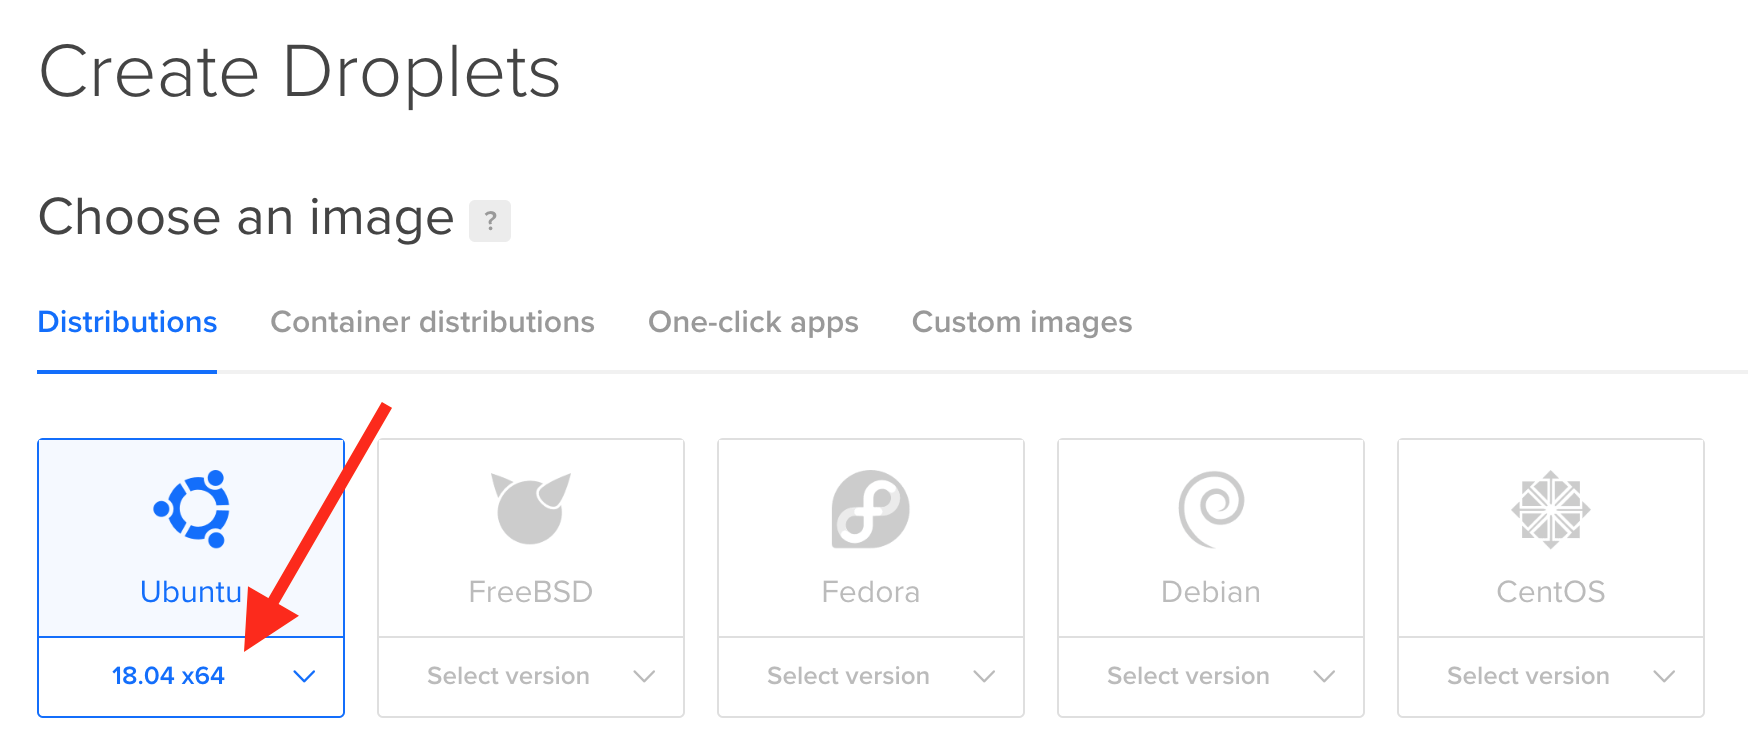
Select “Ubuntu 18.04 x64” for the operating system.
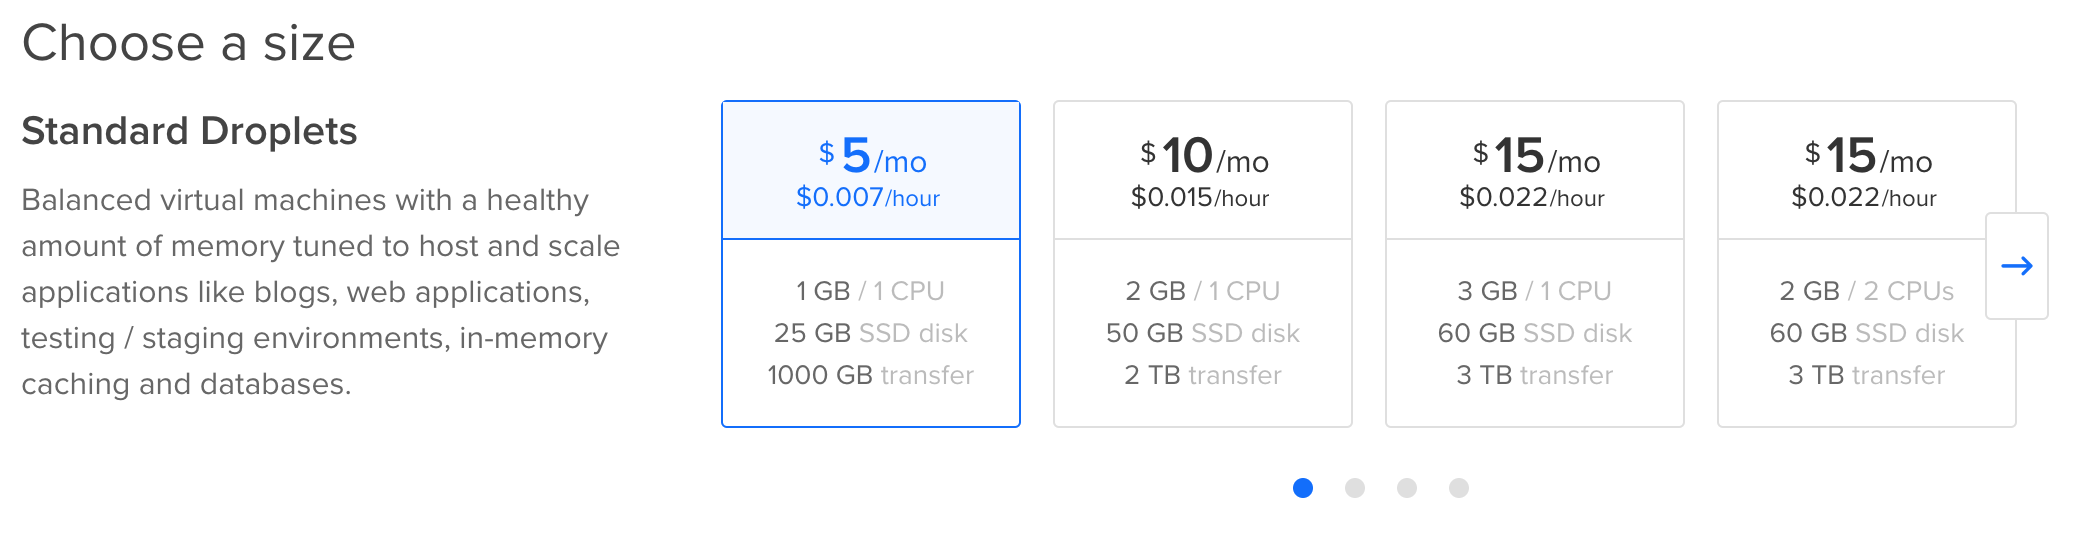
For PyTrackDat, the smallest droplet size ($5 USD per month) is more than adequate, and the most cost effective solution:
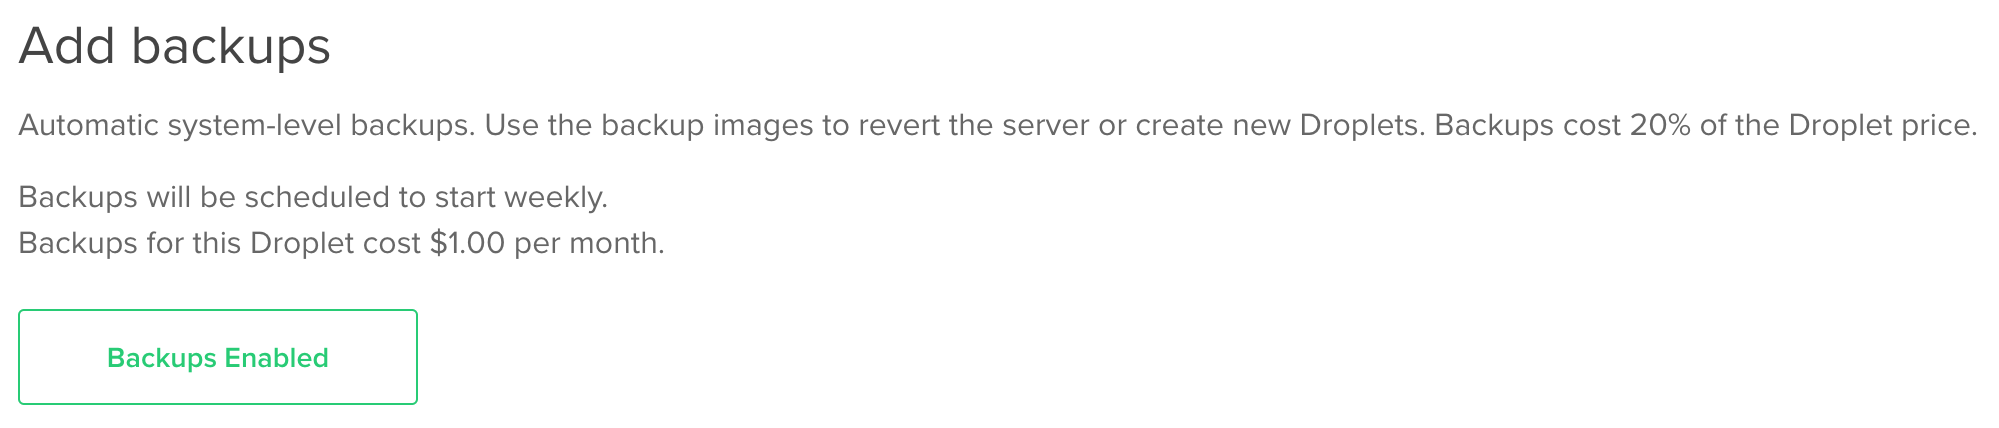
For an additional $1 USD per month, automatic backups can be enabled to keep historical versions of the whole droplet. This may be useful for data integrity and restoring purposes.
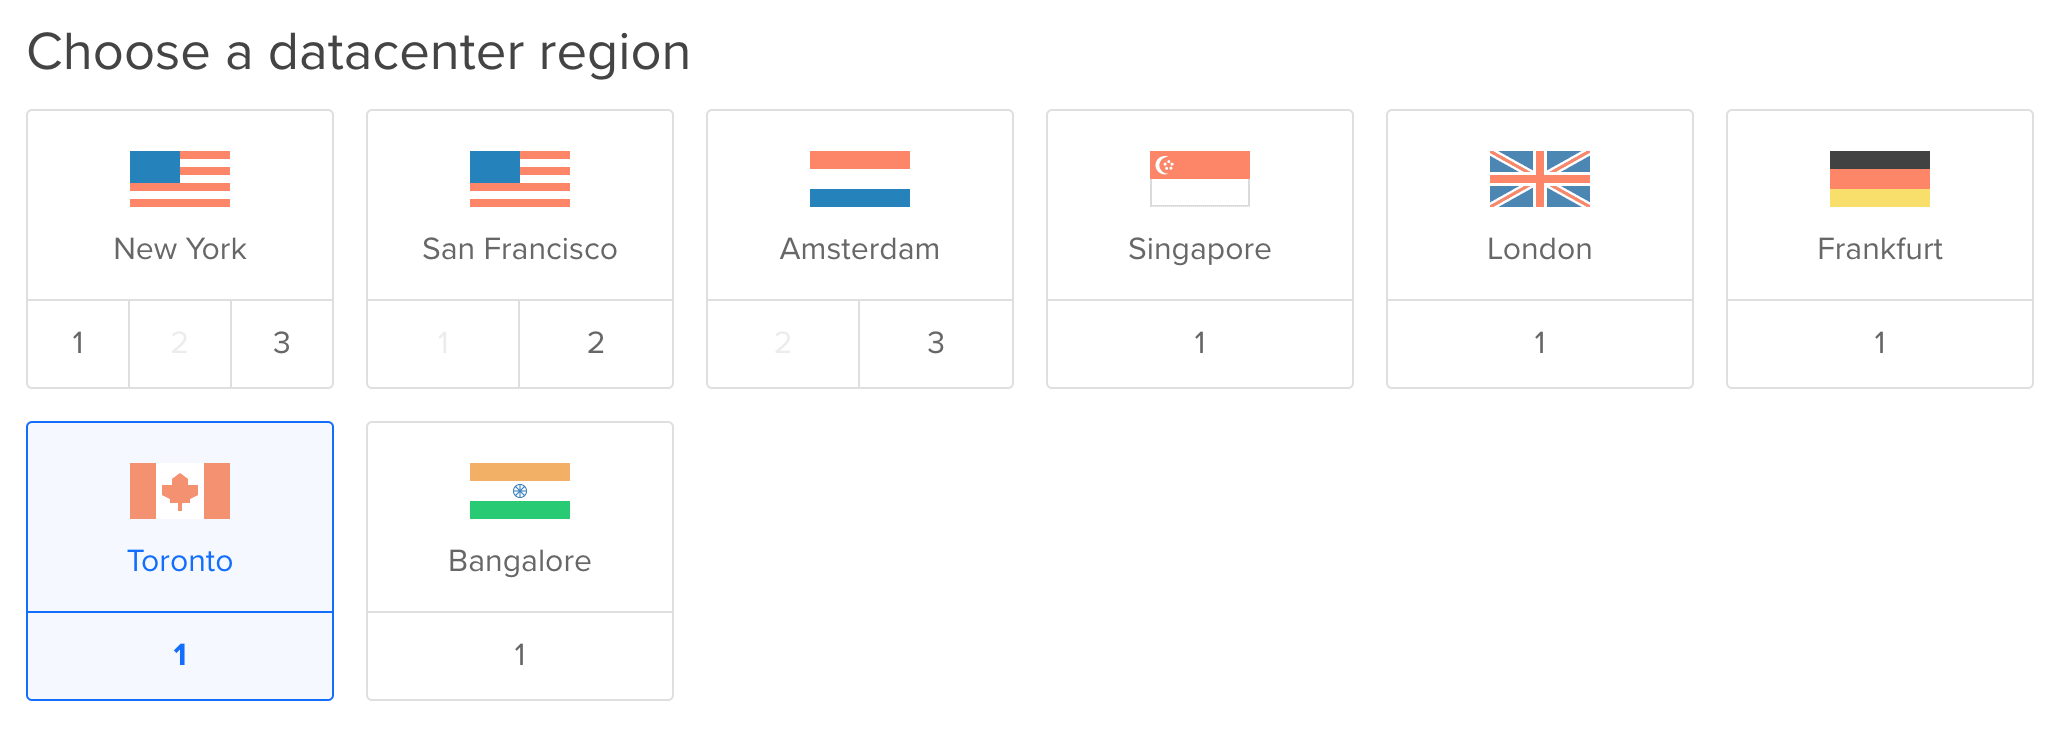
Choose a data centre region closest to where most users will be accessing the database, for maximum performance.
Finally, choose a hostname, which can only contain alphanumeric characters, dashes, and periods. This uniquely identifies the droplet within the account, and press “Create”.
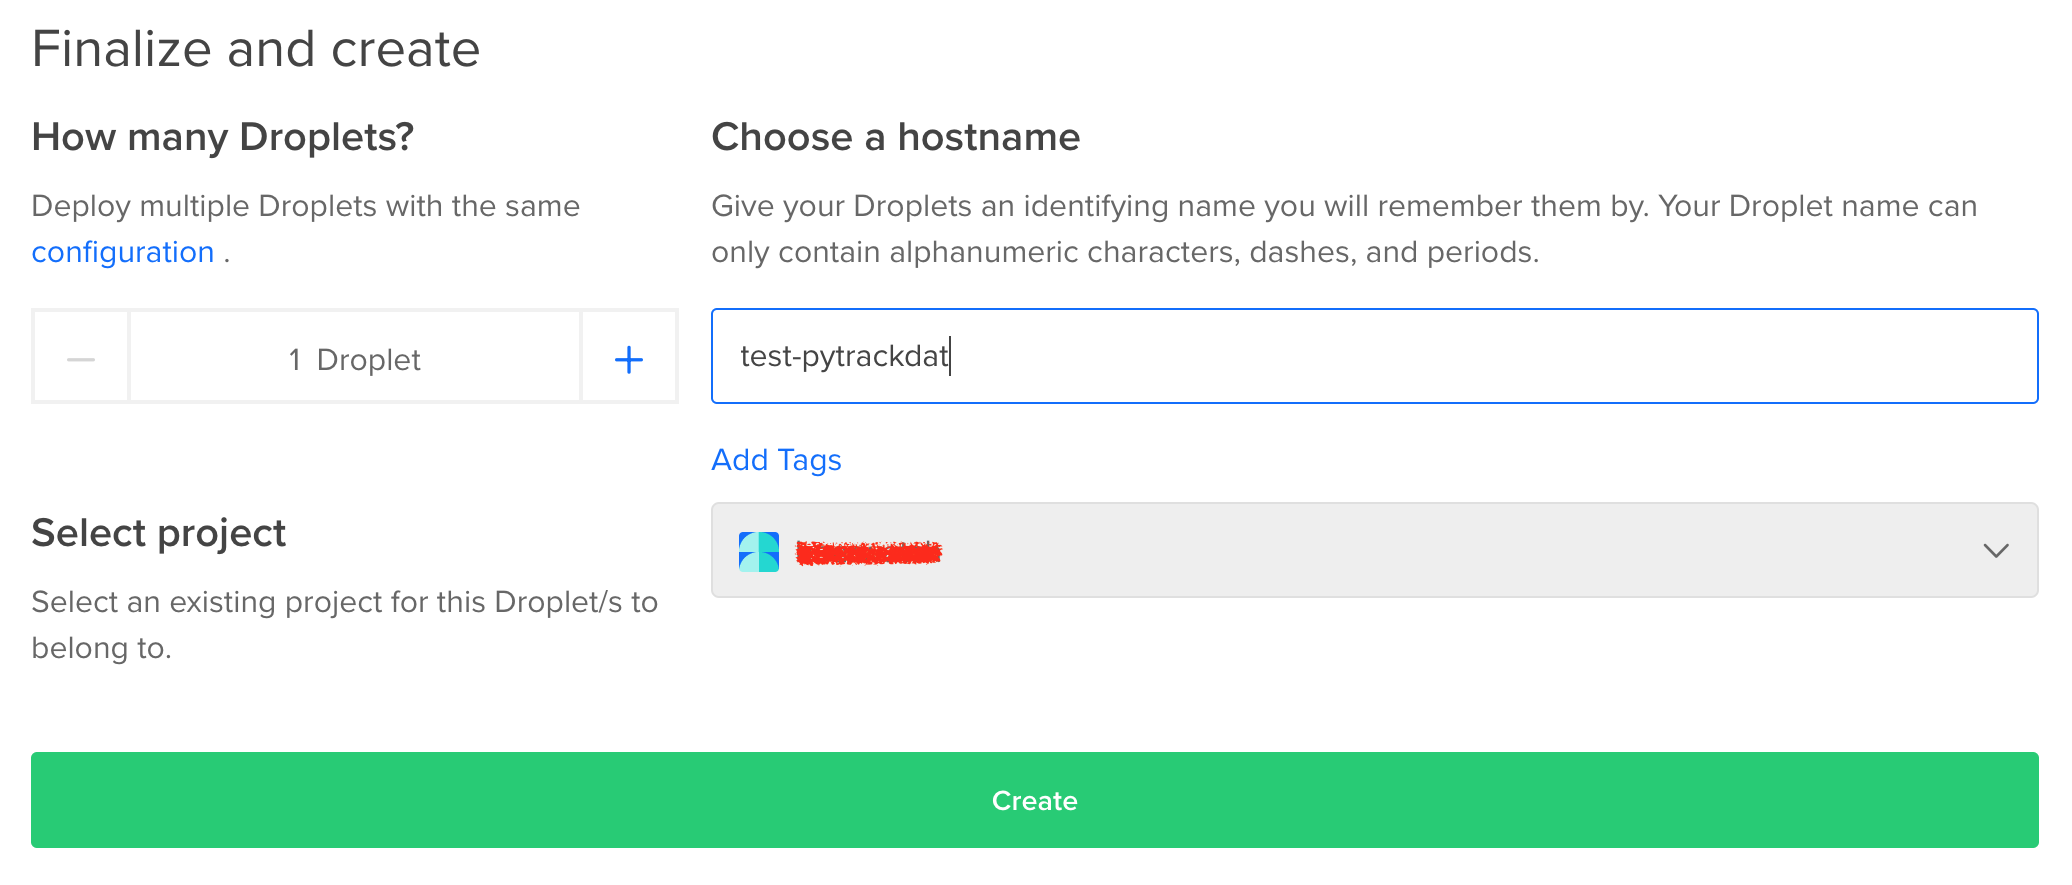
An email will be sent to the address used to register the account. It will contain the newly-created droplet’s IP address (4 numbers, separated by periods) and root password. These are used for logging in to the droplet, and for creating the production (final) version of the PyTrackDat application, which will be uploaded to the server.

Deployment Step 3: Log into the new droplet and set it up
Note for Windows Users: The DigitalOcean tutorials assume the user has a
Linux or macOS system, and in general server administration with these
operating systems is much more straightforward. However, by downloading the
KiTTY utility mentioned in the Dependencies section of this tutorial, SSH can
be used on Windows as well. Whenever a tutorial mentions a command involving
ssh username@server ..., KiTTY can be used instead. Follow our
mini-tutorial to learn how to sign into a droplet.
Follow DigitalOcean’s initial server setup guide to set up a new user account and a basic firewall on the new droplet.
After creating a new account and following the other instructions in the guide,
disconnect from the ssh session by using the following command:
exit
Then re-connect to the droplet using the newly-created non-root user account, typing in the password entered for the new user:
ssh your_username@your.ip.address.here
Note for Windows users: Use the same, alternate method of accessing the remote server as before, using the mini-tutorial provided and described above.
Now the virtual machine is ready for installing the software needed to host the PyTrackDat application.
Deployment steps 3 and 6 will take place on the droplet, and steps 4 and 5 will take place mostly on the local machine (your own computer).
Deployment Step 4: Install Docker and Docker Compose on the Droplet
Docker
Docker is a “container platform” which allows web applications to run inside their own sub-environments. The resulting PyTrackDat applications generated by the scripts are set up as Docker containers to make deploying them easier.
Docker must be installed on any server being used to host a PyTrackDat application.
Follow DigitalOcean’s instruction guide, following only steps 1 and 2, to install Docker on the newly-created droplet.
Further steps cover knowledge not needed for this tutorial, although it may be helpful for further understanding the Docker platform.
Docker Compose
Docker Compose is a system for orchestrating multiple Docker containers at once in a way which makes it easy to put containers online or take them offline.
Install Docker Compose on the droplet by following DigitalOcean’s Docker Compose instruction guide, following only step 1.
Deployment Step 5: Build the application’s production version (on your own computer)
See the aside in step 3, entitled “what is a production build?”, for more information on why this process is needed.
To build the production version of the database application, the ptd-generate
script must be run again on your local computer (i.e. not the new droplet),
this time answering y (yes) to the question Is this a production build?:
ptd-generate design.csv site_name
The script will prompt for a URL. This must match the URL that will be used to
access the site. It can also be an IP address. Whatever value is specified
should not contain http://, https://, or a trailing slash:
Please enter the production site URL, without 'www.' or 'http://':
If a domain name has been purchased (which is outside the scope of this tutorial), additional steps will need to be taken to attach it to the droplet. Nonetheless, the domain name should be entered at this step.
If an IP address is being used to access the droplet (a no-cost option and recommended if the droplet is just being used to host the database), enter that into this prompt. The IP address has already been used in this tutorial to log into the droplet. For example, one could enter the following:
Please enter the production site URL, without 'www.' or 'http://': 142.93.159.136
Deployment Step 6: Upload the application
Now that you have generated the production version of the site, it is time to upload it to the droplet and start it up.
From the PyTrackDat directory, use the following instructions (depending on the operating system on your local computer) to upload the application.
First, make sure you are in the main PyTrackDat directory using cd.
When the ptd-generate script was used to generate the PyTrackDat application,
it created a .zip file archive in the main PyTrackDat directory called
site_name.zip, based on whatever name was entered for site_name when the
script was run.
This archive contains everything needed to run the application, but it must first be uploaded to the server.
macOS or Linux
On macOS and Linux, a built-in utility called SCP is provided, which can copy
a file to a remote server. Run the following command, using the credentials
used previously to access the server via ssh:
scp site_name.zip your_username@your.ip.address.here:~
This will copy the site .zip archive to the home directory of your user
account on the droplet.
Windows
By default, Windows does not include a utility for copying files to remote servers. However, in the Dependencies section earlier in the file, utilities are listed that can assist in this task. Download WinSCP in order to copy the zip file to the server.
Follow our mini-tutorial for WinSCP to upload the .zip
archive to the droplet.
Deployment Step 7: Start the application
To start the application, log into the droplet again, using SSH:
ssh your_username@your.ip.address.here
Note for Windows users: Use the same, alternate method of accessing the remote server as before, using the mini-tutorial provided (see rationale above.)
Then, unzip the archive containing the application within your home folder
on the server, substituting site_name with whatever the archive uploaded to
the server (in the previous step) is called:
sudo apt install unzip
unzip site_name.zip
Enter the application directory:
cd site_name
Use Docker Compose to build and start the application:
docker-compose up --build -d
And finally, allow the site to be accessed externally by adding a rule to the firewall:
sudo ufw allow http
Now, by going to the IP address attached to the droplet, the site should be
visible. Log in using the username and password entered into the
ptd-generate script in order to manage data and other users.
Deploying the End Result on an Existing Linux Server
This guide assumes a moderate amount of prior knowlege about command-line Linux server administration, since the specifics depend on the operating system version and particular configuration of the server in question.
Deployment Step 1: Install Docker and Docker Compose (If Not Already Done)
Follow something similar to DigitalOcean’s instruction guide, following only steps 1 and 2.
Then, install Docker Compose by following steps similar to DigitalOcean’s Docker Compose instruction guide, following only step 1.
These guides are for Ubuntu 18.04 LTS and installation specifics likely differ with other Linux distributions.
Deployment Step 2: Build the Application’s Production Version
To build the production version of the database application, the
ptd-generate script must be run again on your local computer (i.e. not
the VM or server), this time answering y (yes) to the question
Is this a production build?:
ptd-generate design.csv site_name
The script will prompt for a URL. This must match the URL that will be used to
access the site. It can also be an IP address. Whatever value is specified
should not contain http://, https://, or a trailing slash:
Please enter the production site URL, without 'www.' or 'http://':
If deploying without a domain name, use the IP address when prompted for a URL.
Deployment Step 3: Upload the Application
Now that you have generated the production version of the site, it is time to upload it to the server and start it up.
From the PyTrackDat directory, follow the instructions in the above DigitalOcean tutorial to upload the application. Swap the droplet IP address mentioned for the IP address or domain name of the server in question.
Deployment Step 4: Start the Application
To start the application, log into the server again, using SSH:
ssh your_username@your.ip.address.here
Note for Windows users: Use the same, alternate method of accessing the remote server as before, using the [mini-tutorial](mini-tutorials/KiTTY.md) TODO: RE-LINK provided and described above.
Then, unzip the archive containing the application within your home folder on the server:
sudo apt install unzip
unzip site_name.zip
Enter the app directory:
cd site_name
Use Docker Compose to start the application:
docker-compose up --build --detach
And finally, allow the site to be accessed externally by adding a rule to the
firewall. This command will depend on what firewall is being used. For ufw,
the following command can be used (assuming the container is bound to port 80):
sudo ufw allow http
Now, by going to the IP address or domain name attached to the server, the site
should be visible. Log in using the username and password entered into the
ptd-generate script in order to manage data and other users.
Note about Ports and Configuration
These tutorials give instructions for serving the PyTrackDat application on the main HTTP port, port 80. If you want to serve other content concurrently with the PyTrackDat application, additional configuration will be required.